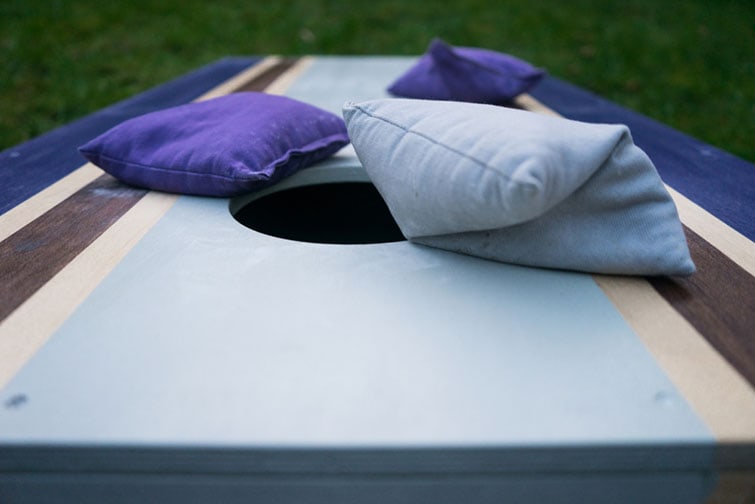
How to Make Cornhole Bags - DIY Cornhole Bag

Those of us who grew up in the Midwest can’t imagine summer without the game of Cornhole. This game is known by many names in different states such as corn toss or bean toss.
To level up the fun quotient, my siblings, cousins and I have been making our own bean bag set for years. DIY cornhole bags are easy and fun. The supplies you’ll need are easily available both online and in local stores. Moreover, it does save a lot of money too.
Not confident about your sewing skills? Fret not. You don’t need to have delicate hands to make bean bags. And it’s okay if they don’t turn out to be perfect. Cornhole bags are not built to last long, anyway.
They will eventually wear away. However, if you follow my lead to a T, you will end up with two sets of sturdy bags.
Before I get started with the step-by-step process of making cornhole bags, let me note down the ACA (American Cornhole Association) regulations for you. If you are serious about the game, your DIY bean bags must meet the following regulations:
- There should be 8 bags per set containing 4 subsets of two different colors. Meaning, you could have 4 red bags and 4 blue bags per set.
- Each bag should be at least 6”x6” squares.
- The bags need to have double stitching around the edges.
- Each bag should contain approximately 14-16 oz. of corn kernels/ plastic resin pellets.
Final weight of each bag should be 1 lb.
The Supplies You’ll Need
To make 8 cornhole bean bags, you will need:
Duck Clothes of Two Different Colors: I always buy two different colors of 10 Oz. duck clothes from my local fabric store. Dyed duck cloth is the best fabric for bean bags due to its amazing durability and huge color options. Cornhole bags made of this thick fabric can withstand the abuse of being tossed around for hours.
Sewing Machine: The ideal sewing machine for this purpose is the kind that delivers both zig-zag and straight stitches. Nonetheless, just about any sewing machine would work.
Thread and Needle: Get some heavy-duty polyester thread, #16 machine needles.
Whole Corn or Plastic Pellets for Filling: Traditionally, cornhole bags are filled with feed-grade corn kernels. Each 1 lb. bag needs to have about 2 cups of corn. However, these days, people hardly use corn anymore due to its fragility.
Corn kernels can break down easily when tossed around for days. This changes the weight of the bag, meaning you will have to frequently refill the bags. That’s why you can alternatively use plastic resin pellets for filling.
These are much more durable and cost-effective too. You can re-use these moisture and mold-resistant materials several times.
Apart from these key materials, you will also need:
- Ruler or cutting guide.
- Rotary cutter and scissors.
- Markers.
- Digital scale/measuring cup to weigh the bean bag filling.
- Funnel to load the bags with stuffing.
- Pins.
How to Make Cornhole Bags – 4 Steps
Step 1: Cut out sixteen 7-inch squares, 8 squares of each color.
Cut out 7” strips from two different colors of fabric with the help of a ruler and a rotary cutter. Then divide each strip into four 7” squares. You will need a total of sixteen 7” squares, 8 squares of each color. Spare about ½” of fabric on the edges for the ease of stitching.
For more precision, you should first cut out the 7”x7” on a cardboard to make a stencil. Then firmly place this stencil on the cloth, take a marker and start tracing. After measuring 8 squares, cut them out. Easy-peasy.
Step 2: Start sewing 3 sides ½ inch from the raw edges
Next up, take two pieces of fabric, line them up for sewing. Adjust your sewing machine for straight stitching at medium speed. Start sewing the sides ½ inch from the raw edges. Do a double stitching to prevent the bag from bursting while throwing around.
Fully stitch 3 sides and leave a small gap on the 4th side for filling the bag. Chop off the corners before flipping your bag inside out.
Step 3: Fill the Bag with 15 Oz of filling (Corn or Plastic)
After cutting the corners, turn the bag inside out. Use a pen or something to poke out the corners.
Next, measure 2 cups of whole corn or plastic pellets for stuffing. Use a digital scale to accurately measure out 15 Oz. of filling. Stick a wide funnel into the gap you left while stitching and start loading the corn. When done, seal the mouth with two pins as close to the edge as possible.
Step 4: Finally Stitch the open side
This is the final step of this process. This time, you will have to sew the thicker side which could be a little tricky for beginners.
Have patience, take your time and always put double stitching. Go for triple stitching if possible. Sew the entire length of the edges for a great finish. For best results, use zig-zag stitch for the final stitching if your machine has this option.
Congratulations! You did a great job.
Your cornhole bean bags are ready now. Go outside and test them out.
